 , fast delivery, and backed by our world-class customer service every step of the way.
  1-800-881-6093
 Back
Back
PR Box Packaging: A Design-First Guide for Brand Managers
PR box packaging is a camera-first branded send designed to generate earned media and usable UGC. It is a product-seeding kit, not a paid, guaranteed placement. Pick the box format that matches your single campaign outcome, then order a sample before you commit to a full run.
Before you touch a configurator, decide what this send is for. That choice drives everything downstream: box type, materials, insert copy, and how much you spend per unit.
- Awareness: prioritize a bold hero reveal and shareable unboxing moment.
- UGC volume: favor lower-cost mailers you can send to more creators.
- Relationship building: invest in a rigid box and a personalized note for a smaller, high-value list.
Key Takeaways
Successful PR box packaging matches box format and finish to one clear campaign outcome, then gets tested as a sample before committing to a full production run.
| Point | Details |
|---|---|
| Pick one outcome per send | Awareness, UGC volume, and relationship building need different box formats and budgets. |
| Match format to goal | Use mailers for scale, rigid boxes for flagship reveals, folding cartons for lightweight brand touches. |
| Order in batches | Batches of 50 to 100 units typically cut per-unit cost by 30 to 40 percent versus one-off printing. |
| Always sample first | Test transit durability and on-camera appearance before scaling to a full run. |
| Design for the reveal | Layered openings, high contrast, and legible typography matter more than costly decorative finishes. |
| Start with Packwire | Use the 3D configurator and low-MOQ options to design, proof, and order a test batch before scaling up. |
Table of Contents
- What Is PR Box Packaging and How Does It Work?
- How Do You Design a PR Box for Unboxing Content?
- What Drives PR Box Production Costs and Timelines?
- What Are the Steps to Order Custom PR Boxes?
- Where Packwire Fits in the Ordering Process
- What Do Successful PR Box Campaigns Look Like?
- What Does the PR Box Production Timeline Look Like?
- How Do You Coordinate Logistics With Fulfillment and Shipping Partners?
- How Do You Vet a PR Box Packaging Vendor?
- Scale Sends or Go Premium? A Practical Rule
- Ready to Design Your Next PR Box?
- Frequently Asked Questions
- Sources
What Is PR Box Packaging and How Does It Work?
PR box packaging is the physical container and presentation system a brand uses to send products to creators, journalists, or influencers with the hope of earning organic content, not a paid deliverable. These sends work because packaging is the first "content moment" a creator experiences, often on camera, before they've formed any opinion about the product itself. Get that thirty seconds wrong and even a great product gets a lukewarm mention. Get it right and you've bought yourself a piece of content you didn't have to script.
Three box formats cover most PR campaigns:
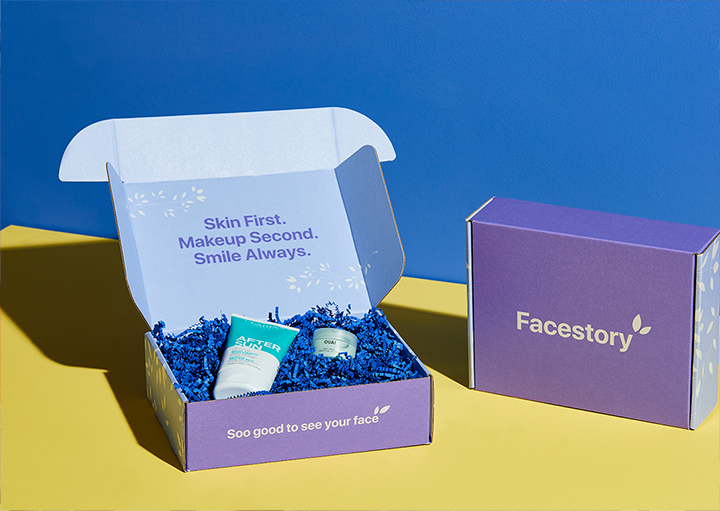
- Mailer boxes: the workhorse for volume sends. Flat-packed, cost-efficient, and ideal when you're mailing dozens or hundreds of creators for a broad UGC push. Custom mailer boxes also print well in full color, so your branding survives the reveal.
- Rigid boxes: the premium option. Thicker walls, a magnetic or friction-fit lid, and a slower, more deliberate opening that reads as luxury on camera. Best reserved for top-tier creators or a flagship launch.
- Folding cartons and corrugated shippers: folding cartons work for lightweight products needing brand graphics without the rigid-box price tag; corrugated shippers exist mainly for transit protection when the outer box isn't the reveal moment.
Camera-friendly boxes tend to land in a mid-size range, big enough to show scale on a phone screen but not so large the product looks lost. A common sweet spot is somewhere between an 8x8x4 inch mailer and a 10x10x4 rigid box, depending on the product. Finishes matter too: matte laminate photographs without glare, gloss adds shine but risks reflection under ring lights, and spot UV or foil stamping on a logo creates a highlight moment creators tend to zoom in on.
Inserts round out the build. Foam or corrugated dividers protect fragile items in transit, while tissue paper, shred, or a custom-printed insert tray add the pause-and-reveal effect that makes for better footage. Packwire's breakdown of insert options covers this in more depth if you're deciding between tray inserts and loose fill.
Pro Tip: If you're testing a new product category, order your first batch as a mailer box even if you eventually want rigid. It's cheaper to learn what breaks in transit before you commit to premium tooling.
How Do You Design a PR Box for Unboxing Content?
Creators film what's easy to film. A cluttered box with three products, five inserts, and no clear focal point rarely makes it past the editing room. Design for the outcome you actually want: an eight-second clip where the hero product looks unmistakable the moment the lid comes off.
Start with the first frame. The hero product should sit centered or slightly off-center against a background color that contrasts, not competes. Packwire's own notes on designing for unboxing videos point to the same lesson: good design emphasizes a clear hero product, layered reveals, and readable messaging built for a phone screen, not a print catalog.
- Plan the reveal in beats. Outer mailer opens to a printed inner lid, the inner lid lifts to reveal the hero product on a raised tray, and a smaller insert underneath holds accessories or a sample. Three beats is usually enough; five starts to drag.
- Keep typography legible at thumbnail size. A logo that reads fine on a laptop screen can disappear on a phone. Test your design at actual mobile resolution before printing.
- Write an insert card that does the talking. A short story about the product, one or two suggested angles ("try it on camera in daylight"), and a clear disclosure reminder go further than a generic thank-you note. A well-written insert card increases the odds a creator understands the story enough to post without prompting.
- Decide personalization strategy by list size. Handwritten notes work below roughly 20 recipients. Above that, a printed note with a variable first name through your fulfillment partner keeps the personal touch without the labor cost.
One line worth including on every insert card: remind creators that gifted product posts aimed at U.S. audiences need clear disclosure, something like "gifted" or "#gifted," under FTC guidance. Skipping this isn't just a compliance risk, it's the kind of detail that makes a brand look amateur to a creator who's seen it done wrong before.
Design choices that help creators film, meaning contrast, legible text, and a simple reveal sequence, usually beat expensive decorative finishes that add cost without adding on-camera clarity.
What Drives PR Box Production Costs and Timelines?
Your per-box cost breaks into four components: the box itself (material and print), the product inside, any inserts or fill, and shipping to the recipient. Rigid boxes with foil stamping cost noticeably more per unit than a printed mailer, and that gap widens fast at low volumes.
Quantity is where most brands overspend without realizing it. Ordering in batches of 50 to 100 units typically cuts per-unit cost by roughly 30 to 40 percent compared with printing one-off. If you're planning multiple waves of a campaign, batching your print run upfront and warehousing the extras is almost always cheaper than reordering small quantities each time.
Framed as content ROI, the math tends to favor seeding over paid production. One illustrative example: sending 100 boxes at $50 each that yields 80 pieces of content works out to about $62.50 per asset, well under the $150-plus per asset that paid UGC production commonly runs. Packwire's packaging ROI calculator is a useful gut check if you want to run your own numbers before committing budget.
Plan your timeline around these realities:
- Sample production typically takes several business days once artwork is approved, longer if you're testing a rigid box with custom tooling.
- Standard production runs need more lead time than samples; rush options exist but usually carry a premium.
- Minimum order quantities vary by box type. Low-MOQ options exist specifically so you can test a design before scaling.
- Fulfillment and shipping need their own buffer, especially if you're timing a send to land the same week as a product launch.
What Are the Steps to Order Custom PR Boxes?
Treat this as a checklist, not a series of open-ended decisions. Fewer decisions made mid-process means fewer delays.
- Define the campaign objective and recipient list. One outcome per send, whether that's awareness, UGC volume, or relationship building, and a finalized list of who's receiving it.
- Choose box type, material, and finish. Match the format to the objective: mailer for scale, rigid for a flagship moment, folding for a lightweight brand touch.
- Select your inserts. Decide on trays, dividers, and insert card copy, including the disclosure reminder for U.S. sends.
- Prepare artwork to dieline specs. Export files to the exact template your box style requires and request a prepress proof before anything goes to press.
- Order a sample first. Test both durability in transit and how the box performs on camera.
- Approve the proof, then schedule production and fulfillment. Lock your production date against your launch date, with shipping buffer built in.
Pro Tip: Photograph or film your sample being opened before approving the full run. What looks fine in a rendering sometimes reveals awkward proportions once it's actually unboxed.
Where Packwire Fits in the Ordering Process
Packwire's 3D configurator lets you preview your dieline and artwork on a simulated box before you commit to print, which cuts down on the sizing and fit mistakes that usually only surface after a sample arrives. Low minimum order quantities mean you can test a design at a smaller volume before scaling to a full campaign, and every order goes through an artwork review and prepress check to catch problems before they become expensive reprints.
A configurator that shows your actual artwork on your actual box, before you pay for it, turns guesswork into a five-minute decision instead of a week-long back-and-forth with a print vendor.
What Do Successful PR Box Campaigns Look Like?
The pattern across effective PR box campaigns is consistency, not cleverness. A skincare brand launching a new serum sends a rigid box with a single hero product on a raised platform, a printed insert explaining the formula, and a small sample size tucked beneath, all timed to arrive the week before launch. A beverage brand running a broader seeding push instead sends 200 mailer boxes with a simpler two-item layout: the product and a single insert card with a suggested camera angle, prioritizing reach over polish.
Both campaigns succeed for the same underlying reason: the packaging matches the objective. The skincare brand needed a handful of high-quality pieces of content from established creators, so it spent more per box on fewer sends. The beverage brand needed volume and organic reach, so it spent less per box and sent to more people. Neither approach is universally correct, but each is correct for its own goal.
The common failure mode looks different: a brand tries to combine both goals in a single send, cramming a premium reveal, three product variants, and a long insert booklet into one box aimed at fifty creators. The result usually undersells the premium branding on the influencers, who wanted volume, and underserves the volume send with an unnecessarily expensive build. Pick one lane before you design.
What Does the PR Box Production Timeline Look Like?
Most PR box campaigns move through five phases, and the biggest scheduling risk is compressing the first two.
Design and proofing comes first: finalizing artwork, submitting it to dieline specs, and getting a prepress proof approved. Rushing this phase to "save time" is the most common cause of reprints later.
Sample production follows once the proof is approved. This is your chance to catch transit damage or awkward on-camera proportions before a full run locks in.
Full production starts after sample approval. Lead times here depend on box type and finish complexity, with rigid boxes and foil stamping generally needing more time than a straightforward printed mailer.
Fulfillment prep overlaps with production tail end: confirming recipient addresses, staging inserts, and coordinating with whoever is physically packing and shipping each box.
Shipping and delivery closes the loop, and this is where launch-timed campaigns most often slip. Build in a buffer of several extra days beyond the carrier's stated delivery window, especially for multi-recipient sends where one late address shouldn't hold up the rest.
The brands that hit their launch date treat design approval as the true start of the clock, not an afterthought squeezed in before "the real work" begins.
How Do You Coordinate Logistics With Fulfillment and Shipping Partners?
The biggest bottleneck in most PR box campaigns isn't the box, it's collecting accurate shipping addresses and consent from dozens or hundreds of creators without drowning in direct messages. Using a branded intake form that feeds directly into your fulfillment software removes a step that otherwise eats days of a marketing coordinator's time.
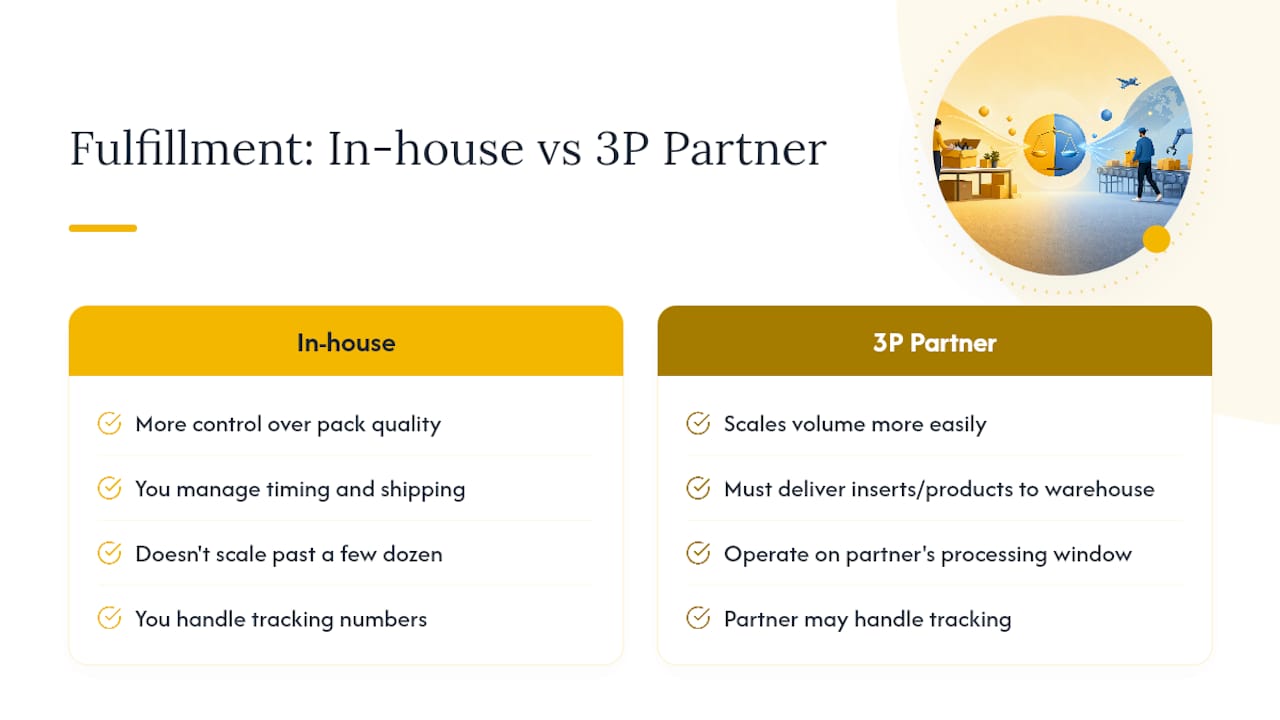
Once addresses are collected, decide early whether you're fulfilling in-house or handing boxes to a third-party fulfillment partner. In-house fulfillment gives you more control over pack quality and timing but doesn't scale well past a few dozen recipients. A fulfillment partner handles volume better but needs your inserts, printed materials, and product delivered to their warehouse on a schedule that respects their own processing time, not just your ship date.
Whichever route you choose, confirm three things before you finalize a launch date: the carrier's realistic delivery window to your recipient regions, whether any recipients are outside standard domestic shipping zones, and who is responsible for tracking numbers if a creator needs to know when to expect their box for content planning. A creator who's blindsided by a box arriving during travel or a busy week is a creator who's less likely to post promptly, if at all.
Build your shipping date backward from your desired "in creator hands" date, then pad it. Carrier delays are common enough that a same-week delivery target for a launch is asking for trouble.
How Do You Vet a PR Box Packaging Vendor?
Not every packaging vendor is built for PR sends, and the wrong choice shows up as delays, size errors, or a box that photographs poorly no matter how good the design file was. A few questions separate a reliable vendor from a risky one.
Ask whether they offer a live 3D preview or configurator before you commit to print. Vendors relying on flat proof PDFs make it harder to catch sizing and layout problems until a physical sample arrives, which costs you a full production cycle if something's off. Ask about minimum order quantities and whether low-volume testing is genuinely supported or just tolerated at a punitive price. A vendor whose MOQ pricing punishes small test runs is telling you they're not built for brands that iterate.
Confirm what their prepress review actually catches. A vendor who reviews files only for print-readiness (bleed, resolution) but not for dieline fit is leaving you exposed to the exact errors a proofing step is supposed to prevent. Ask for turnaround time on both samples and full runs, and get it in writing if your timeline is tight around a launch date.
Red flags worth walking away from: vague answers about production location, no sample option at all, or pricing that only becomes clear after you've submitted artwork. A vendor confident in their process shows you pricing and lead times upfront, not after you're already invested in the file review.
Scale Sends or Go Premium? A Practical Rule
The conventional advice, "invest more in packaging, always," misses the point. Premium materials matter when you have a short list of high-value creators and a launch moment worth protecting. For broad UGC pushes, a well-designed mailer beats an expensive rigid box you can only afford to send to twenty people. Match spend to reach, not to what looks impressive in a mockup.
Ready to Design Your Next PR Box?
Once you know your box type and reveal sequence, the fastest path forward is designing it directly rather than waiting on quote emails from a traditional print broker. Packwire's 3D configurator lets you drop your artwork onto a real dieline and see exactly how the reveal will look before you spend a dollar on production, and low minimum order quantities mean you can test a design with a small batch instead of committing to a full run blind. Every order gets an artwork review and prepress check, so the file that goes to print is the one you actually approved. If you're planning a mailer-style send for volume seeding, start with Packwire's custom mailer boxes and order a sample before you lock your campaign date.
Frequently Asked Questions
Can any brand buy PR boxes, or do you need a certain size to order? Any brand can order custom PR box packaging. Low minimum order quantities exist specifically so smaller brands can test a design before committing to a large production run.
How much does PR box packaging typically cost? Cost depends on box type, finish, and quantity. Ordering in batches of 50 to 100 units usually lowers per-unit cost by 30 to 40 percent compared with a one-off print run, and simple mailer boxes cost less per unit than rigid boxes with foil stamping or custom inserts.
How long does it take to produce and ship a PR box order? Samples generally take a few business days once artwork is approved, and full production runs need more lead time, especially for rigid boxes with custom finishes. Add shipping time on top, and build in a buffer if the send is timed to a launch date.
Do I need to tell creators to disclose gifted products? Yes, for U.S. audiences. Creators posting about a gifted product need to disclose it clearly, such as with "gifted" or "#gifted," per FTC guidance. Include a reminder on your insert card so creators don't have to guess.
Sources
For a deeper look at how brands structure product-seeding campaigns, see the guide to PR packages and UGC ROI and the creator marketing breakdown of PR box design. Brands sending edible or fragile products may also find the gourmet packaging presentation tips useful for camera-first visibility. On the ordering side, Packwire's custom box styles and rigid box configurator are the fastest starting points for a live design.
- PR Packages: How Brands Use Product Seeding to Drive Awareness, UGC, and ROI
- PR Box Meaning: A Brand's Guide to Creator Marketing - JoinBrands
- PR Box Meaning: A Strategist's Guide to Unboxing ROI
Recommended
- A Quick Guide to Packaging Design | Packwire
- The Ultimate Guide to Low MOQ Custom Boxes: Bypassing B2B Red Tape | Packwire
- Packaging Optimization: A Handy Guide to Help Achieve Higher Levels of Customer Satisfaction | Packwire
- The Corporate Swag Evolution: How to Create Welcome Kits Your Team Will Actually Keep | Packwire